By Cathy Dew
Setting up Multilingual sites doesn’t have to be intimidating
Last week we introduced you to the idea that your web site should be multilingual and discussed some of the design philosophies, needs and costs associated with going multilingual. This week we will cover the planning steps for a successful multilingual implementation, as well as, how to configure Kentico to manage and display your new multilingual content.
Planning for going Multilingual
The obvious first question is which languages do you want or need to support? While the exact number of languages directly affects your translation costs, which languages chosen are also important from a display and design perspective. Some languages display right to left, others display left to right. Other languages are succinct while others are “wordy.” These display needs will require some design flexibility by your interface developer. Be prepared to make minor adjustments to your website’s theme and content containers as you add new languages.
Another important decision for your multilingual site is which language is going to be primary or default. What language do you want to display if a visitor, via their browser language settings, requests a language you don’t currently offer? Additionally, one of the challenges all companies face when building multilingual sites is there are multiple cultures that “share” the same language. While the languages are not exactly the same due to cultural linguistic differences, they are closely related, and deciding which version of French is important to your primary French visitors. Additionally, it’s the idioms and location specific neologisms that a good translator will avoid in order to make sure your translated content is as general as possible to the target language’s audience.
 Your web site decides on the language rendered by using the culture code provided by the browser. When a user picks a default language for their browser or operating system, the system is assigned a country & language code. For example, Canada has two culture codes: EN-CA and FR-CA. This means you could serve the visitor English or French content developed for a similar culture, EN-US or FR-FR. This way you don’t have to build a set of pages for all countries that speak French or English. If in the future there comes a need for breaking out the same language for different countries you can still do that.
Back end Setup
When you setup Kentico the first time, you selected a default language and culture. What we’ll need to do now is activate additional cultures for Kentico to manage and display. Note that we are not setting up a new language for the Administrative interface, that is a different process.
In Kentico, new languages are added by activating cultures within your target site. Once you log into the administrator interface, drill down to Sites :: [Target Site]. Edit the target site, select Cultures, and click the “Add Cultures” button.
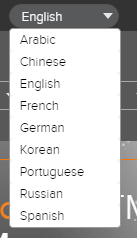
 You can then filter the list for the target languages you wish to activate. Check all the boxes that apply, search again, repeat until you have everything selected. Then click the “Select” button.
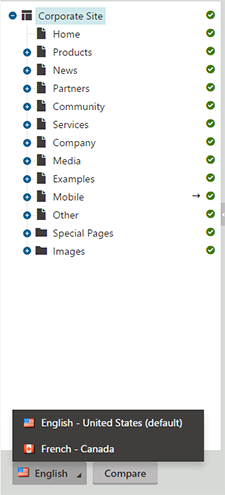
Once saved, the new languages will be available via the Content Management: Pages admin area. This will allow editors with access to multiple languages the ability to switch back and forth as needed to edit pages and create new content.
Default Languages by Domain or URL
One powerful way to display translated content is to setup different domains to show the appropriate content. For example, your site can be registered under different country top level domains like:
- CompanySite.ca
- CompanySite.fr
- CompanySite.se
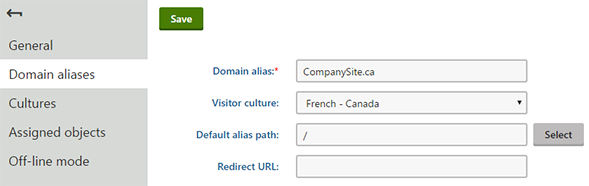
Within Kentico you can then identify a specific language/culture with each domain alias.
- CompanySite.ca: French – Canada
- CompanySite.fr: French – French
- CompanySite.se: German – Sweden
If you don’t want to register your company website under multiple country registration systems, you can also do this with sub-domains via your primary domain:
- ca.CompanySite.com: French – Canada
- fr.CompanySite.com: French – French
- se.CompanySite.com: German – Sweden
 Using a domain name to route your audience to the correct language is your best option for search engine optimization. However, if you want to use a single domain name, you can control the language rendered via the URL.
The URL control can be provided via query string or via a language path prefixes. Switching between languages using the query string is as simple as adding the following to your links:
- /[pagename]?lang=fr-ca or /[pagename]?lang=de-se
This will reset the visitor to the selected language and the user will continue to see the site in the selected language until they click on another language changing link.
To setup Kentico to pre-pend the language automatically in the URL path, you need to update a setting in the SEO options. Go to Settings :: URLs and SEO, and select “Use language prefix for URLs”.
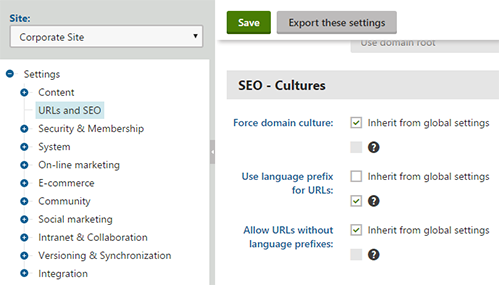
Note that using language prefixes is not compatible with language specific domains. You need to select one path or the other for displaying your translated content.
Lastly, in order to provide a simple process for your visitors to select different languages you should have a web part on every page that give the user all of your language options. This is important if they came to your site via a link to content in a language they don’t prefer. Kentico had a language data source web part and combined with a repeater web part you can easily customize a language drop down that fits the theme of your site.
In our next post, we’ll discuss how to edit multilingual pages and setup Kentico EMS to support automated translation efforts. Can’t wait for the next blog posting on Multilingual integration into your web site? Not a problem. 2Plus2 is a Kentico Gold Partner and would love to help you get the most out of your Kentico system. Go online to schedule a free consultation with our team or call 510-652-7700 today.